In this post, we will use several Python libraries to convert HTML or web page to image. We will cover several different examples:
- copy entire page
- capture screenshots by tag, class and id
- take image by coordinates
- libraries
- html2image
- pyppeteer
- Playwright
- selenium
html2image
We will start by lightweight Python package - html2image that acts as a wrapper around the headless mode of existing web browsers to generate images. It can be installed by:
- html2image
pip install html2image
Simple example that take screenshot of the full page by:
from html2image import Html2Image
hti = Html2Image()

hti.screenshot(url='https://www.python.org', save_as='python_org.png')
pyppeteer - local file
To convert HTML file to an image using a CSS locator in Python, we can use the pyppeteer library:
It can be installed by: pip install pyppeteer
import asyncio
from pyppeteer import launch

async def html_to_image(html_file_path, css_locator, output_image_path):
    browser = await launch()
    page = await browser.newPage()
    await page.goto(f"file://{html_file_path}")
    element = await page.querySelector(css_locator)
    bounding_box = await element.boundingBox()
    await page.screenshot(
        output_image_path,
        clip={
            "x": bounding_box["x"],
            "y": bounding_box["y"],
            "width": bounding_box["width"],
            "height": bounding_box["height"],
        },
    )
    await browser.close()

asyncio.get_event_loop().run_until_complete(html_to_image("path/to/file.html", "css/locator", "output/image/path.png"))
pyppeteer - save web page as image
pyppeteer library can also convert live pages to images. We will use page.goto() to navigate to the URL - https://www.example.com:
import asyncio
from pyppeteer import launch

async def live_page_to_image(url, css_locator, output_image_path):
    browser = await launch()
    page = await browser.newPage()
    await page.goto(url)
    element = await page.querySelector(css_locator)
    bounding_box = await element.boundingBox()
    await page.screenshot(
        output_image_path,
        clip={
            "x": bounding_box["x"],
            "y": bounding_box["y"],
            "width": bounding_box["width"],
            "height": bounding_box["height"],
        },
    )
    await browser.close()

asyncio.get_event_loop().run_until_complete(live_page_to_image("https://www.example.com", "css/locator", "output/image/path.png"))
pyppeteer - search by tag, class and id
We can cxtract all div elements with class "my-class" and id "my-id":
import asyncio
from pyppeteer import launch

async def extract_to_images(url):
    browser = await launch()
    page = await browser.newPage()
    await page.goto(url)

    elements = await page.querySelectorAll('div.my-class#my-id')

    for i, element in enumerate(elements):
        # Get the bounding box of the element
        bounding_box = await element.boundingBox()

        # Take a screenshot of the element
        element_screenshot = await element.screenshot()

        # Save the screenshot to a file
        output_image_path = f"output/image_{i}.png"
        with open(output_image_path, "wb") as f:
            f.write(element_screenshot)

    await browser.close()

asyncio.get_event_loop().run_until_complete(extract_to_images("https://www.example.com"))
Playwright
Alternatively we can use Python library playwright to take screenshot of web pages:
- playwright
pip install playwright
To capture screenshots in Playwright, we can use the screenshot() method of the Page class. To select elements by tag and class, we can use the querySelectorAll() method:
from playwright.sync_api import Playwright, sync_playwright

def extract_to_images(url: str):
    with sync_playwright() as p:
        browser = p.chromium.launch(headless=True)
        page = browser.new_page()
        page.goto(url)

        # Select all div elements with class "my-class"
        elements = page.query_selector_all('div.my-class')

        for i, element in enumerate(elements):
            # Take a screenshot of the element
            element_screenshot = element.screenshot()

            # Save the screenshot to a file
            output_image_path = f"output/image_{i}.png"
            with open(output_image_path, "wb") as f:
                f.write(element_screenshot)

        browser.close()

extract_to_images("https://www.example.com")
selenium
We can capture screenshot with Selenium:
- selenium
pip install selenium
from selenium import webdriver

def extract_to_images(url: str):
    # Set up Firefox driver with geckodriver executable
    driver = webdriver.Firefox(executable_path='/path/to/geckodriver')

    # Navigate to URL
    driver.get(url)

    # Select all div elements with class "my-class"
    elements = driver.find_elements_by_css_selector('div.my-class')

    for i, element in enumerate(elements):
        # Take a screenshot of the element
        element_screenshot = element.screenshot_as_png

        # Save the screenshot to a file
        output_image_path = f"output/image_{i}.png"
        with open(output_image_path, "wb") as f:
            f.write(element_screenshot)

    driver.quit()

extract_to_images("https://www.example.com")
Firefox
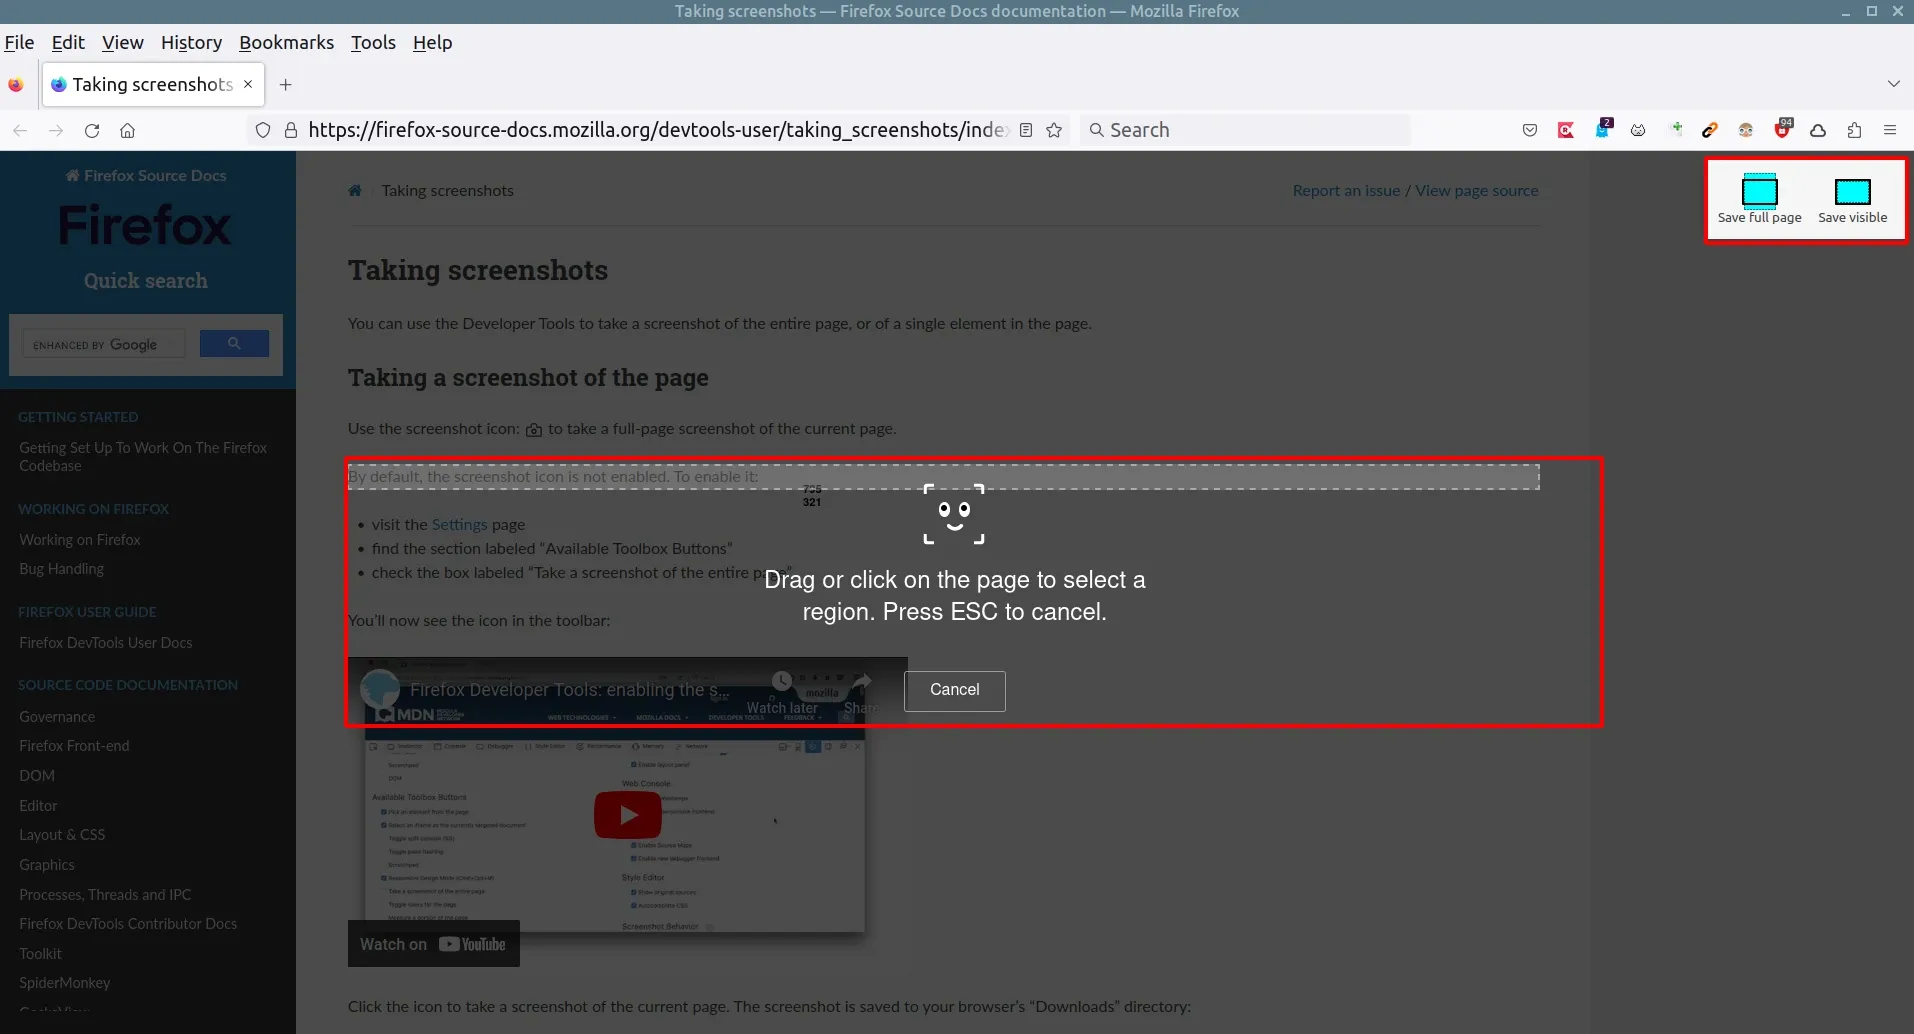
Finally we will check two examples how to take manually screenshot in Firefox.
To take screenshot of page in Firefox we can do:
-
right click on the web page
-
Take Screenshot
- Select Element - hover over the part or region of the page
- Save full page
- Save visible


